Ethers.js is an alternative to web3.js and is designed to make it easier to communicate with most Blockchain. Binance smart chain(bsc) has also more recently become arguably the most notable deployment chain in recent times.
for this tutorial,
- I would be showing you how to write a simple smart-contract.
- Deploying it to the Binance smart chain BSC testnet,
- Creating a simple API.
- Interacting the smart-contract through that API with the help of NodeJS and Ethers.js.
We would be using solidity for smart contract development, if you are new to this, solidity is the development language for the Ethereum smart contract development, this is also the language for our smartcontract we would be working on since BSC is based on EVM.
This tutorial requires that you have a NodeJS API, for that you can use this awesome tutorial shouldn’t take you about 15-20mins to do, also, that you have prior knowledge on javaScript and NodeJS.
Cool.., let’s begin,
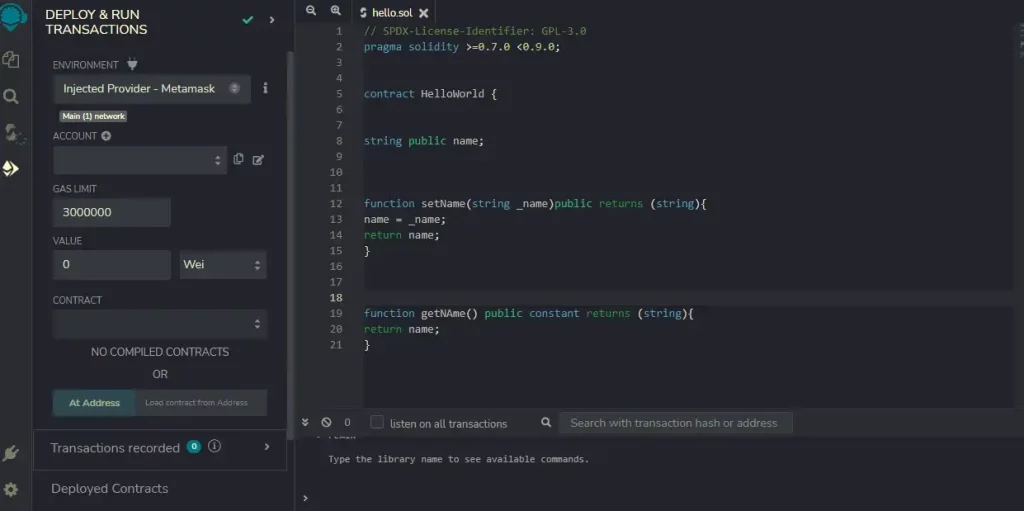
We need to create a simple smart contract with solidity, we will be using the Remix IDE, create a new script in the contract folder named “hello.sol” and paste the code below in it.
// SPDX-License-Identifier: GPL-3.0pragma solidity >=0.7.0 <0.9.0;contract HelloWorld {string public name;function setName(string memory _name)public {name = _name;}function getName()view public returns (string memory){return name;}}
what our contract basically does is to set a name value and then allow us to retrieve it; using the setName and getName function. now let’s go ahead to deploy this contract to BSC test net, ensure you have metamask added to your chrome extensions, click on the metamask icon, at the dropdown menu at the pop of the metamask popup window, click on add network,
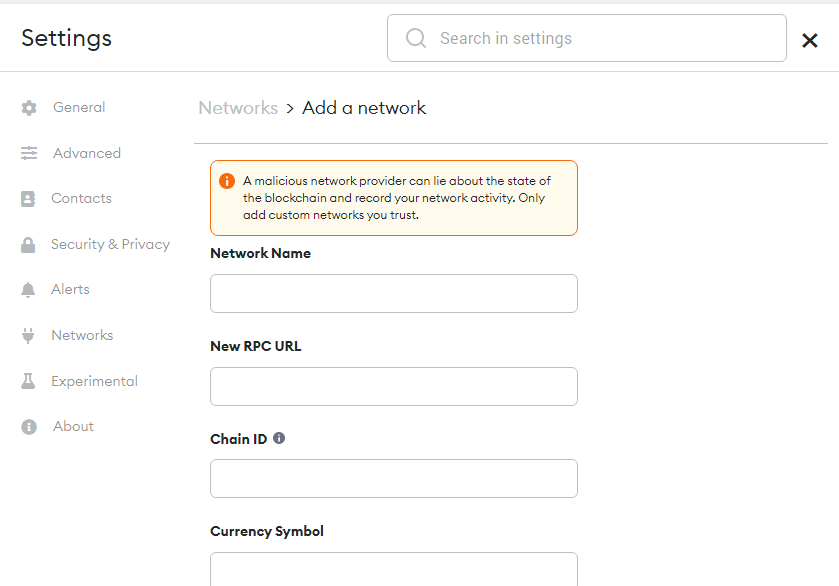
name the network as bsc, for Chain ID paste 97, for RPC URL paste this https://data-seed-prebsc-1-s1.binance.org:8545/, for block explorer paste this https://testnet.bscscan.com/, now click save next, copy your address and head over to this website to get free BNB, we will need it for our deployment gas fees.
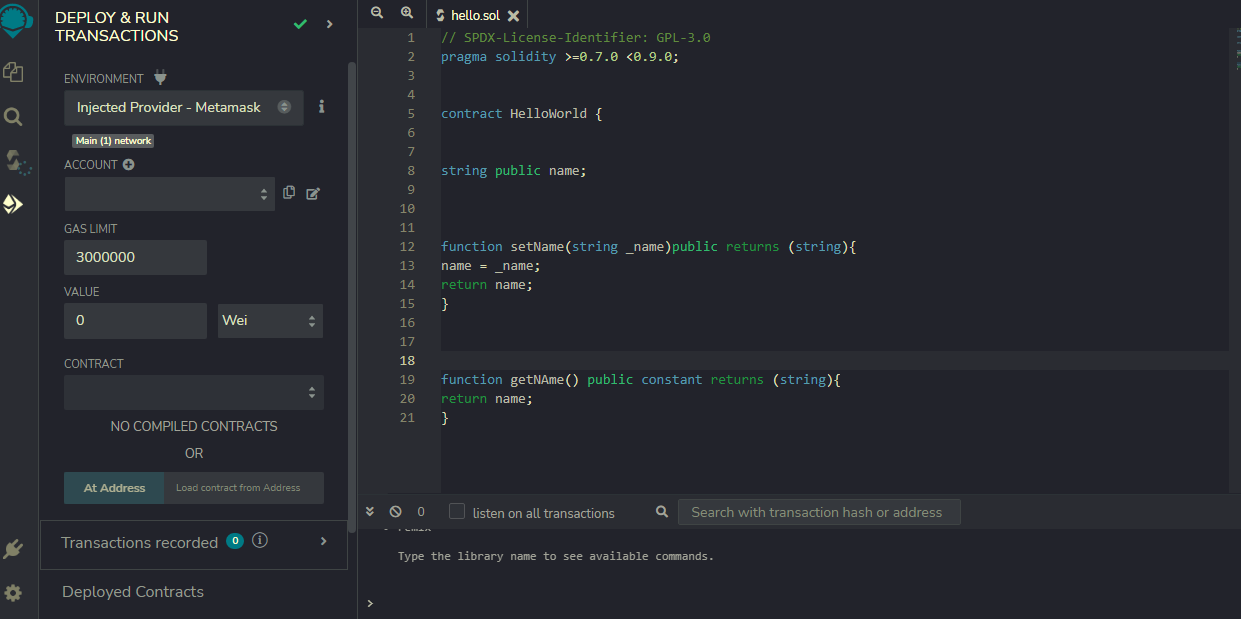
Great!!, now return to remix, click the deploy icon and on the environment tab choose “Injected provider-metamask”, once metamask pop-up appears, pay the gas fees, and viola we just deployed our smart-contract to BSC.
Now here’s where the fun stuff starts.
We are done with our smart-contract and metamask, now go to your code editor where your API is created, we will start by installing ethers.js first.
npm install — save ethers@3
now update your import in the routes file with these
const express = require('express');const Model = require('../model/model');const router = express.Router()var ethers = require('ethers');const abi = require('./abi.json')const provider =new ethers.providers.JsonRpcProvider('https://data-seed-prebsc-1-s1.binance.org:8545/',{name:'binance',chainId:97})var address = 'your contract address should come here';var privateKey = 'put your private key here';var wallet = new ethers.Wallet(privateKey,provider);var contract = new ethers.Contract(address,abi,wallet);
What we have done is import the ethers.js library, we have also pointed our RPC to BSC testnet, then initialized our wallet and contract. you can get your Private-key from your BSC metamask account by just clicking on “Account details”.
Next in the routes folder create a file and name it “abi.json”, then go to remix, click on the artifacts folder navigate to hello.json file, copy all the data in the abi array starting from the opening square bracket to the closing square bracket.

Paste this in the abi.json file.

now create a new route by pasting this code below in your routes.js file or wherever your routes are .🙂
//testrouter.post('/write',async(req,res)=> {var result=[];var sendPromise =await contract.setValue(req.body.word);const data=Promise.resolve(sendPromise)data.then(value=>{result=value;res.status(200).json({message:result})});})
what we have done here is to create an empty array called result so we can pass our response from the blockchain to it, then the next thing we did was to call the setValue function on our contract using ethers.js to sign the transaction from our BnB account, then we passed the response as an API response.
let’s test it out now.
https"//localhost:3000/api/write

Great, it works, I have passed ”Dee” as the body of my request, so it saves using the setName function on our smart contract on Binance testnet.
now let’s try to read our data,
//Get all Methodrouter.get('/read', async (req, res) => {var result=[];var sendPromise =await contract.getValue();const data=Promise.resolve(sendPromise)data.then(value=>{result=value;res.status(200).json({message:result})});})
We call the getName function through the getValue call on our smartcontract
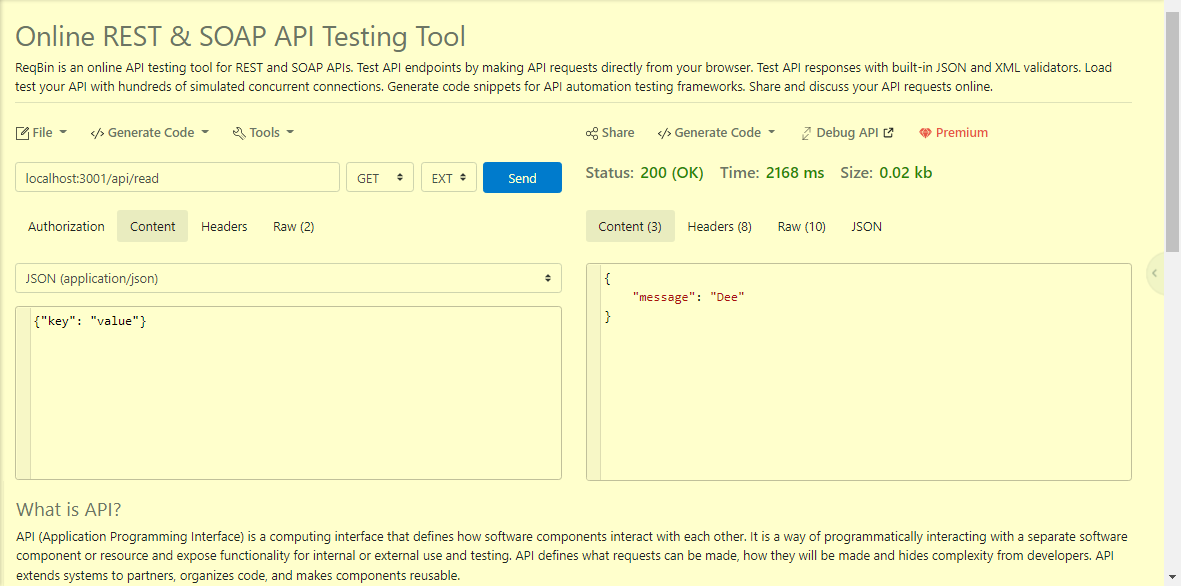
Great!, we can both send data and read data from our smart-contract, You can also test this out on postman and check your response on your smart contract on the BSC blockchain here.
AWESOME, You just developed, deployed, and served your first web3 project as a backend.